Titanium Backup + Dropbox HOWTO

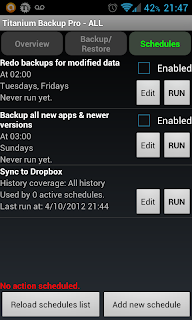
I set this up today at long last (and assume most of it will apply to Box as well). Couldn’t find much use on how to actually make it sync, so here is a picture!

Go into your Preferences -> Cloud sync settings; and enable dropbox. You can go into Dropbox Settings to control stuff like what to sync and where to sync, etc. Then go to the “Schedules” tab and voila!

I don’t see what is so schedule about that, and I seem to remember reading that you have to do sync’s manually rather than on a schedule but whatever. Couldn’t find crap on Google, so I took a screenie ^_^.

Having glanced at news of the new Kelper card running the Smaritan demo, a job that originally took a trio of 580 GTX cards (can you say expensive and smokin’ hot?). I couldn’t help but wonder, just how much optimization work may have been invested between NVIDA and Epic Games, to get that monster running on the new card.

Well, turns out from the sound of it, that it probably wasn’t quite as bad as I thought it would be or not in the ways I expected it would be. The new FXAA (Fast Approximate Anti Aliasing) technique being one such “Unexpected”. The fairly simple write up in the article hints to normal people, why the amount of video memory on graphics cards have been going up so much. Damn, I remember when 32M was just starting to fade away, and when 256M was the going norm’ alas, times change.
Anti-aliasing is one of those things, people see in their games video settings (usually) but don’t understand. They only can summise it must be “Better” the higher the number gets and that e.g. 16x AA must be better than 0. Ditto for issues like Anisotropic, trilinear, and bilinear filtering. It really isn’t hard to understand. Further complicating the life of a gamer,  some games let you choose various types of Anti Aliasing (such as MSAA or CSAA).
Anti-aliasing makes things look “Better” in simple terms. Let’s just say that aliasing is a distortion of the image. Something like this: 
The above picture taken from Wikipedia shows the effects of anti-aliasing on the right. SImply put, it makes things better. In some games it can be a lot more noticeable than others, Raven Shield or Call of Duty for example might benefit from AA a lot better than Sonic the Hedgehog or Pong.
The problem is it is expensive. Imagine, you can make things appear less jagged but you must pay a painter to smooth out the image. Now imagine, not only do you have to do this not only for every Frame Per Second of game play, but also for every pixel on screen. On my computer that is 1,920 x 1,080 = 2,073,600 pixels. Most games need at least 25-35 frames per second to be playable smoothly and 50~60 can be noticeably better.
The artist is using your CPU and GPU (graphics card) to do all this work. Because the screen works with “Pixels”, little dots, it can be a hell of a lot of work but hey, it’s easier to smooth out your neighbors than using a paint brush.
 
Techniques for doing all this shit have varied with time but in essence, they can vastly change the work load on your computer. One way of thinking it, if you can play a game fine in 800×600 with AA, you might be doing more work than playing it in 3200×2400 without it! This site has a great and simple write up about various techniques. 
In general a little anti aliasing is good but you are not likely to notice turning it all the way up to 16x FSAA, give or take your computer might cry.
FSAA should probably be avoided unless you want to boast about your hardware or publish screen shots that look good.
MSAA is close enough that for how much less work it takes to do, it’s worth while. 
CSAA or CFAA are available on most decent graphics cards since 2006, and is worth consideration. Think of it as similar to MSAA in the way MSAA is to FSAA. If you have a fairly dark game like SWAT 4 or Modern Warfare 2, as opposed to a very vibrant and colorful game, CSAA is probably worth it.
If you have a lower end graphics card, try using CSAA. If you can _actually_ tell the difference or just want to flaunt your cash, try MSAA.
In most cases, it is “O.K.” to use like 2x or 4x AA in a game now. It’s not like the old days when the computers just couldn’t handle it so much without better hardware. By the time you reach and exceed like 8x (MS)AA, you are probably not going to notice the difference all that much, seriously. If the difference between 16x MSAA and 8x MSAA is so easily seen on your screen and it bugs you, you probably should get a top end graphics card.
How to tell what you should use? Welp, just try a value like 4x Anti Aliasing and see how it impacts your game. If your computer can’t handle it, try tuning it down a bit (2x or off). If you can run it fine, hey, feel free to see if you can go up a notch or two.
A little secret though: no one gives a shit as long as the game looks good and plays good. So as long as you don’t turn the setting to high, it’s all good.
Curse you irony!

Just before I got up to pee, I was looking at Skinomi carbon fibre skin protectors and thinking, “Maybe later” after I get my new dock.

Guess what? My foot caught the fucking charging cord and slid my Prime off the desk, and me “Snap catching slash pushing” it against the desk to keep it from falling: just gave me a finger nail sized ding in the aluminum backplate.

*groan* nothing like denting $600 because it takes for fucking ever to get a dock shipped here: that extra batter life and keyboard really helps.

The Big Android Browser Test

There have been a couple of things on the net about various browsers, I’m sure, but certainly nothing comprehensive that I have found. Like wise, over @XDA in the Transformer forums at least, things tend to get muddled up after awhile from all the commentary.

So I thought I would install a shit load of browsers and do some testing! My test procedures can be found here.

It will take a while to do in my off hours and I doubt I’m going to get much done today, stuck home with the parental unit sick, so, I’m pretty much on butler call all day :-/. I’d rather be getting work done, like debugging yesterdays crap near interrupt free.

Playing with linpack and power save modes on my prime

This is what I’m getting with basically just a few web pages open in Opera:

  • Performance mode: up to 90-125 MFLOPS. Usually in the one hundred and teens.
  • Balanced mode: averaging around 75-115 MFLOPS. Most often between 90-110.
  • Power Save mode: averaging around 50~70 MFLOPS.
Every test was in multithreaded. The first anandtech review of the Prime has a good stack of stuff in it, I’m just fiddling around out of curiosity, not profiling :-).On the TF101 which has no power save settings in the stock ROM, and I believe my notes are recorded here.

Argh, sometimes technology just makes me sick!

Recently, I updated my journal about the repairs I tried on Sunday, well yesterday I started breaking in a TF201 and working on the epoxy trick. No luck but hey, ICS is really freaking awesome and my Prime is solid, even if I still prefer the TF101’s build.

Now today, I just threw my hands up. I was jugging things getting data transferred and the like, well, I accidentally added an icon on my TF101’s home screen and instinctively tried to remove it with my finger, before I could realize which tablet I was touching. Guess what? I got the long tap event in ADWLauncher Ex but couldn’t drag it. I got the bloody touch event in the dead area of the screen, where haven’t been able to get touch invents without using the docks touch pad! But no dragging or sliding stuff would work and the touch events would only work every few taps…than suddenly the mother fucking thing just started to work PERFECTLY until it crashed toggling the screen. Now it works perfectly.

I guess maybe whatever component got jarred just a smidge loose to cause that, must have somehow got pressed back in without me trying to do it manually, well, trying successfully, since I couldn’t get it open again… :-/. All I know is that sometimes technology makes me fucking sick!!!

*kicks the air* I’m really glad it works (for now) but I hate it when stuff like this happens o/.

My summery of Android versions

  • 1.0.
    • September of 2008.
  • 1.1.
    • February of 2009.
    • General software refinements, which I’ll usually omit below.
  • 1.5 Cupcake.
    • April of 2009.
    • Third party (custom) keyboards are now possible.
    • We got widgets!
    • Bluetooth A2DP and AVRCP profiles (think stereo).
  • 1.6 Donut.
    • September 2009.
    • Voice I/O.
      • Voice input (Speach to Text).
      • Multi-lingual voice output (Text to Speech)
    • Apps can make their data available to search results.
    • Better support for gestures.
  • 2.0 – 2.1 Eclair.
    • 2.0 in October of 2009, 2.0.1 in December of 2009, and 2.1 in January of 2010.
    • Support for multiple accounts in sync.
    • Exchange account support for email.
    • Camera app sucks much less.
  • 2.2 – 2.2.3 Froyo.
    • 2.2 in May of 2010, 2.2.1 and 2.2. in January of 2011, 2.2.3 in November of 2011.
    • Dalvik VM gains Just In Time (JIT) compilation.
    • Exchange support becomes USEFUL.
    • USB and WiFi tethering. (Use your phone as a bridge between your laptop and your data plan.)
    • Now have the option to DISABLE mobile data.
    • Apps can now be installed to external memory (e.g. MicroSD card).
  • 2.3 – 2.3.7 Gingerbread.
    • 2.3 in December of 2010, 2.3.3 in February of 2011, 2.3.4 in ???, 2.5 in July of 2011, 2.3.6 in September of 2011, and 2.3.7 in ???.
    • Native support for SIP VoIP.
    • Selecting text to cut/copy/paste actually works.
    • Text input cursor can now be precisely positioned.
    • Ext4 replaces YAFFS(2) as standard file system.
    • Native support for more sensors; gyroscopes, barometers, etc.
    • NFC support.
  • 3.0 – 3.2.2 Honeycomb
    • 3.0 in February of 2011, 3.1 in May of 2011, 3.2 in July of 2011, 3.2.1 in September of 2011, 3.2.2 in August of 2011.
    • Notification bar moved from top of screen to bottom corner.
    • On screen software buttons (back, home, multi-task, menu, …) and the action bar.
    • View of recent apps can be snap shots (multi-task button) or existing icon view (long press physical home button).
    • Browser UI becomes more like Google Chrome.
    • Browser can now sync bookmarks with Google Chrome.
    • Apps are now commonly multi-pane, e.g. message list and message body on one screen.
    • More hardware acceleration.
    • Support for multi-core CPUs.
    • Encrypting user data.
    • USB devices now work as expected, e.g. flash drives, game pads.
    • Proper support for Bluetooth keyboards, gamepads, etc.
    • Stock launcher now allows widgets to be resized.
    • WiFi performance can be maintained when screen is off (WiFi locking).
    • Apps designed for small screens can be zoomed or stretched to fit.
      • this Android 2.2 feature is a really good thing and makes many reviewer’s complaints about Honeycomb less of a big deal for normal people.
    • Screenshots (or was this just a TF101 thang?).
      • Previously required a custom ROM like Cyanogen Mod.
    • Pasting integrated with 2.3.x selection UI.
  • 4.0.1 – Ice Cream Sandwich.
    • 4.0.1 in October of 2011, 4.0.2 in November of 2011, 4.0.3 in December of 2011.
    • Small screens get traditional (1.0-2.3.x) UI, large screens get tablet style (3.x) UI from Honeycomb.
    • On screen software buttons (from 3.x) now work on phones.
    • Stock launcher catches up to common features of custom launchers.
    • Access apps from lock screen.
      • Previously required custom ROM/UI (e.g. Sense; Cyanogen Mod).
    • Unlock your phone by taking a picture of your face.
    • New Roboto font.
    • Can now monitor data usage without requiring third party apps (or custom ROMs).
    • Camera app sucks less.
    • Basic photo-editing.
    • Much stronger NFC integration, alternative to Bluetooth data transfer.
    • Yet more work on hardware acceleration.
    • WiFi Direct, a form of Ad-hoc WiFi networking and bridging.

Attempting to fix my ASUS Transformer TF101’s blank screen

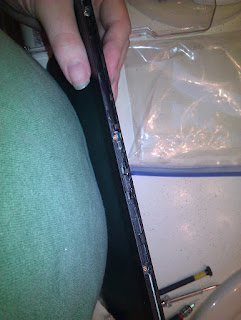
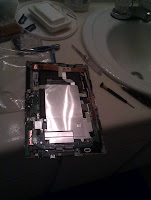
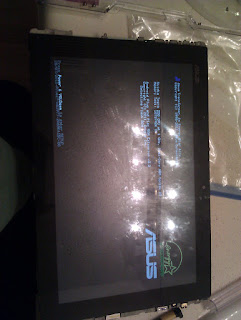
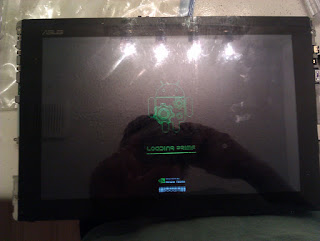
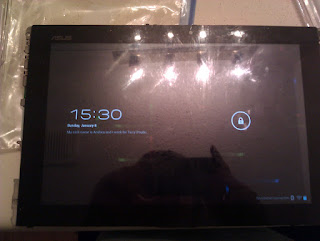
Been a while but finally I’ve got a moment to update my journal, lol. Saturday night, Andera (my TF101-B1) slid off the mattress and ended up with a blank screen, and briefly some green garbles. The backlight was still working and my tablets survived the same and worse landings unscratched so, plus I know what kind of guts these things are made out of, so I knew it couldn’t possibly be hardware failure. The photo’s I took are all captioned and in an Album here.

Determined, on Sunday I went out in search of a torx screwdriver. As it happens, Fry’s didn’t have any T5’s left, just T6’s and the threads over at xda-developers said T5. So I spent the worst $10 of my life, on one of these. It’s a real piece of shit beyond the driver bits. Turns out though that some joker decided to stuff a Phillips PH000 in place of a Torx T5, and not include the T5 anywhere o/. Fucking bastards! But on the upside that was the right size for the Phillips screws I had to work with.

So I ended up undoing the torxex on the bottom (by the docking port) with a T6, and left one of them stripped by the time I was done. After that it was time to pry off the bezel, which I did a dandy number on; when putting it back on resulted in a barely working power button,I pryed it  up and used gravity to fix the power button before snapping it back in. What I found was that it’s a lot easier to pry off from the back end, YouTubest be damned.

There are three screws on top and bottom, and two on each side. I kinda missed the top three taking off the back plate so it might be good that it’s just cheap plastic.

Getting the base plate on/off was easy. Also under the metal plate that goes over the battery, is an empty space that looks like it is where you would install the 3G modem on a TF101-G.

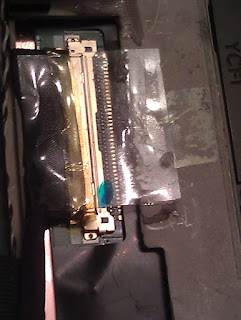
Most of the connectors are the ugly ribbon goes into stupid pin slot with flip holder kind of Flexible Flat Cable thingy. I hate those and don’t know why they are so popular, but alas, I didn’t build the darn thing or design it. So next up I had to figure out which one is the one I needed, I tried all of them that were readily accessible just to be safe (bad idea).

In my poking around xda-developer’s I found a link to somewhere that sells replacement screens, that told me where to find it. There is even a YouTube video on the whole procedure (I’ll edit in a link from my browser history later). I personally found it easier to remove the power connector so I could access the video FFC better:

To be sure I was right or would more likely figure out what it does (in case of gross ID10T error on my part), I pulled it and reseated it very firmly.

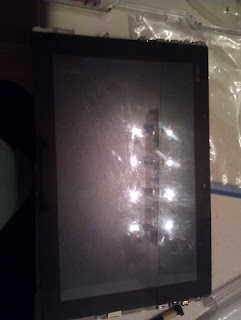
Fired it up and voila! The touch screen was working. So I studied how much I fractured my bezel and put it back together, note carefully that the holes nearest the docking port are for the TORX screws that go in LAST!

On boot up, everything went perfectly well until I noticed that back and home didn’t work. A little bit of testing showed that entire portion of the touch screen is not getting any touch events :'(. I’m not sure if it’s another ribbon out of place or just that I missed a couple screws on the back plate (d’oh). But since I  have the dock, I’m pretty much able to use it. The one torx is now too stripped to drive, so until I figure out a solution to that, Andera is missing touch input on the left most (view able) inch of the screen.

I don’t have a drill or I would just hit the hardware store for a drill bit to get the sucker out, and trust me,  my trusty awl doesn’t seem to one to carve a slot in it. Don’t have any rubber bands good enough to try, so I’m thinking about grabbing a tube of epoxy on the way home from work and see what happens….if I can fix it, I’m gonna fucking fix it! In the mean time, I’ve ordered a Transformer Prime / TF201-B1, because the best I can get here is a TF101-A1; and I’m already using over 10GB on my TF101-B1, so $400+whatever memory card Best Buy has, is not worth it. Like wise, if I’m getting stuck spending so much money, may as well buy the prime instead of a later version of TF101-B1 (mines a B50 with no Q/C issues). I’m very partial to my mid-generation TF101….

Oh, btw don’t forget to put the screws in the back plate if you try this at home.

Dropbox 2.0 for Android: fixing your folder

I don’t get why so many people are pissed at this. The old folder location was at ${sdcard}/dropbox. This is really good for an app like Dropbox and I wish they would have kept it, but to be honest, it does technically belong in the new location of ${sdcard}/Android/data/com.dropbox.android/files/scratch. Although I would’ve used dropbox or cache instead of scratch but whatever.

Don’t like it? Well guess what, fix it yourself. Open a terminal emulator [0] [1] and do the following:


example# ln -s /mnt/sdcard/Android/data/com.dropbox.android/files/scratch /mnt/sdcard/dropbox

If you get an error about no ln command being found, you should install busybox and add it to your $PATH.

If you’ve got a real MicroSD card, you may get an error about the operation being unsupported (etc). In which case you either need root or you need to use a file system that supports symlinks. Which means probably reformatting your memory card as NTFS, or EXT4, or YAFFS2. Whatever your shit can read, because FAT32 is probably not going to support symlinks.


If you’ve got a device like my Transformer, that has an internal memory on /mnt/sdcard (${sdcard}), odds are the actual data is somewhere behind a FUSE shim, and is really stored at something like /data/media on an ext4fs partition. Easy symlinkage!

If none of the above makes any sense, you only no one tenth the power of Android and should have learned more about unix and Android, or maybe have bought an iPhone.

My word, if you’re not using Opera and it’s Dragonfly for web development, all I can say is Firebug users, eat your bits out.